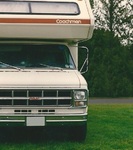
I didn't get much done to the camper over the holidays. I had a few jobs to do around the house, and some maintenance jobs to do on the cars etc. So with all those finally done, I stole a few easy days between christmas and New Years, and I did f*ck all but eat, drink and watch tv. Taking the dog for a walk every odd day..,

I needed the break!
I got back to wrenching on the camper yesterday. I needed to fit the timing chain cover which meant the sump had to come off.

I didn't realise that the timing chain cover had to be fitted first before fitting the sump, which I had already done a few months ago.
Anyway, two steps back, one step forward, but Job done.

I need a special tool to press-fit the harmonic balancer onto the crankshaft, so that job will have to wait for a bit.
The manifolds had to be cleaned up and painted with some Hi-temp paint. The best I could get my hands on was Simoniz 800c manifold paint. We'll see how long it lasts. I also had to remove the rusted Smog ports and rusted flange studs. I plan to replace all exhaust bolts with Stainless steel bolts. The smog ports I'm just going to blank off with 1/2" UNF grub-screws as I'm "deleting" all of the smog pump paraphanlia.
The rusted-in studs fought me every inch of the way but i eventually got the job done. 4 of 6 had to be drilled & tapped.
Next thing to do was to fit the manifolds. But to my amazement the bolt holes were miles off? WTF?? The two centre bolts fitted no problem, but the front and rear bolt holes would not line up with the holes on the heads!
Before I got out the die-grinder, I decided check in with folks that have experience with chevy engines, and I discovered that the chevy V8 manifolds ARE renowned for warping and being a bit of a pig to refit... Theres a special tool available - A "manifold stretcher", but I'd have had to order it from the USA and wait a few weeks. No bueno...
I had to come up with a plan B...
Some 20mm electrical conduit and a length of M16 threaded bar.
My DIY stretchers worked remarkably well. Albeit a bit scary to be stretching a cast iron manifold and waiting for the loud crack every moment, but there was none thanks God.
Before fitting the manifolds I checked the mating faces for flatness (on a thick sheet of glass) and I found some misalignment, so I had to mill them to make sure all faces were flat.
Final fitting - passenger side. Stretchers working fine

Driver side fitted & torqued: